
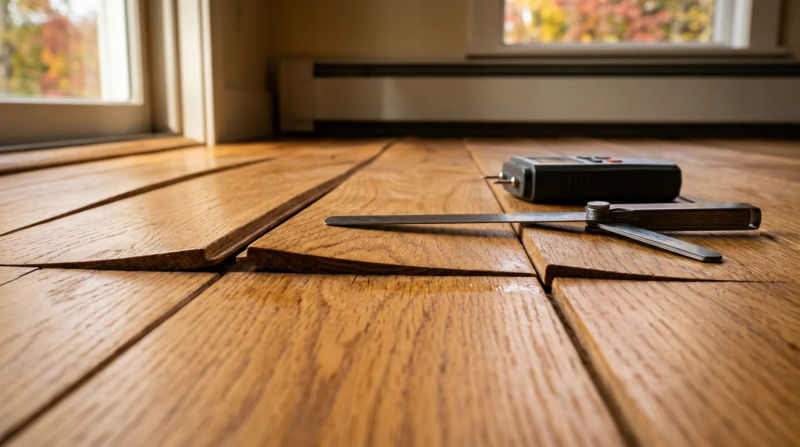
As an experienced builder here in the Louisa and Mineral area, I’ve seen how the first real chill of autumn can bring a unique set of challenges for homeowners. You start sealing up the house, raking the heavy fall leaves, and maybe even turn on the furnace for the first time. It’s cozy, but it’s also when I start getting calls about hardwood floors. A common scenario I hear goes something like this: you're walking through your living room and the light from the window catches the floor just right, revealing that your once-flat hardwood planks now have a wavy, uneven look. The edges of each board seem to be raised slightly higher than the center. If this sounds familiar, you’re likely seeing hardwood floor cupping.
It’s a frustrating problem, but it's also a signal your floors are sending you. They’re telling you there’s an imbalance somewhere in your home’s environment. My goal with this article is to share what I’ve learned over the last 12+ years on the jobsite, helping you understand what your floors are trying to say and what steps to take next.
Common Signs and Symptoms
Hardwood floor cupping is a distinct visual and textural issue. The term "cupping" is quite literal - the edges of an individual plank become higher than its center, creating a concave or "U" shape across the width of the board. When this happens across an entire floor, the surface takes on a washboard or rippled appearance.
Here are the key signs my team and I look for during an initial assessment:
- A Wavy Surface: This is the most obvious symptom. Look at your floor from a low angle with a light source, like a window or a flashlight, shining across the surface. This low-angle light will cast shadows along the seams of the planks, exaggerating the cupped shape and making it easy to see.
- Uneven Feel: If you walk across the floor barefoot, you might feel a subtle (or not-so-subtle) bumpy texture. The high edges of the boards will be noticeable underfoot.
- Tight Gaps: In the early stages, you might notice that the gaps between your floorboards seem to have disappeared. This is because the wood is expanding from excess moisture.
It’s important not to confuse cupping with its opposite, known as “crowning.” Crowning is when the center of the board is higher than its edges. This often happens when someone makes the critical mistake of sanding a cupped floor before the underlying moisture problem is solved.
What Causes This Problem
At its core, hardwood floor cupping is almost always caused by a moisture imbalance. Wood is a natural, hygroscopic material, meaning it acts like a sponge, absorbing and releasing moisture to stay in equilibrium with its surrounding environment. Cupping occurs when the bottom of the wood planks is wetter than the top.
The wood fibers on the damp underside of the board expand, while the drier fibers on the top surface shrink or stay the same size. This difference in expansion forces the edges of the board to curl upward.
Here in our area, there are several common Mineral VA hardwood cupping causes that I see time and time again:
- Crawl Space and Basement Moisture: This is the number one culprit, especially in the beautiful, historic homes that characterize Mineral. Many of the pre-1940s Craftsman and Folk Victorian houses were built over dirt-floor crawl spaces with minimal ventilation. These spaces can trap ground moisture, which then gets absorbed by the subfloor and the underside of your hardwood. As we head into fall, heavy leaf fall can clog foundation vents, further reducing airflow and trapping even more moisture.
- Seasonal Humidity Changes: Our region experiences significant humidity swings. After a humid summer, we suddenly seal up our homes in October and turn on the dry heat. This rapidly dries out the top surface of your floors. If you have a damp crawl space or basement, the bottom of the boards remains moist while the top dries out, creating the perfect conditions for cupping.
- Plumbing or Appliance Leaks: A slow, undetected leak from a dishwasher, refrigerator ice maker line, or a pipe under the sink can saturate the subfloor over weeks or months, leading to localized but severe cupping.
- Improper Acclimation: Before installation, new hardwood flooring must be left inside the home for several days (or even weeks) to acclimate to the home's specific temperature and humidity levels. If this step is skipped, the wood will acclimate after it's been nailed down, often resulting in cupping or gapping.
- Incorrect Cleaning Methods: Consistently using a soaking wet mop or a steam cleaner on hardwood floors can force water down between the planks, creating a moisture imbalance from the top down and leading to other serious issues.
When to Call a Professional
Once you've spotted cupping, the first impulse for many is to call someone to sand the floors flat. This is precisely the wrong first step. Sanding should be the very last resort, not the first solution.
Your first step should be to play detective. Check your crawl space or basement for signs of moisture, dampness, or musty smells. Look for any evidence of slow leaks around appliances. If you can identify and resolve a minor, temporary moisture source, a slightly cupped floor may relax and flatten on its own over a season as the wood dries out evenly.
However, you should call an experienced professional if:
- You cannot find the moisture source.
- The cupping is severe or covers a large area.
- The floor has been cupped for an extended period.
A qualified flooring specialist will bring a crucial tool: a moisture meter. Taking moisture meter readings for wood floors Mineral homes have is a non-negotiable diagnostic step. We use it to measure the moisture content at the top of the plank, the bottom of the plank, and in the wooden subfloor. A significant difference in these readings confirms the moisture imbalance and helps us pinpoint the source.
This brings us to the critical question: when to sand cupped hardwood floors? The answer is simple: only after the moisture problem has been completely resolved and the wood has returned to its normal, flat state on its own.
If you sand a cupped floor prematurely, you are only sanding the high edges down to be level with the sunken center. Once the underlying moisture issue is fixed and the wood eventually dries out completely, the boards will flatten. But now, the edges you sanded down will be lower than the center, creating a crowned floor. Crowning is a much more severe problem that often requires removing a significant amount of the wood's surface to correct, shortening the life of your floor.
Conclusion
Seeing your beautiful hardwood floors begin to cup can be alarming, but it’s important to remember that it's a symptom, not the disease itself. The cupping is a clear sign of excess moisture coming from below the floor. Your primary goal should always be to identify and eliminate that moisture source.
Resist the urge to immediately sand and refinish the floor. Patience is key. By addressing the root cause - whether it’s improving crawl space ventilation, running a dehumidifier, or fixing a leak - you give your floors the best possible chance to relax and return to their natural shape. Sanding should only ever be considered after the floor has fully stabilized.
If you notice any of these signs of hardwood floor cupping, it's always best to contact a local flooring contractor for an inspection. They can help you properly diagnose the issue and protect your investment for years to come.